Plugin Installation Guide
Welcome to Proexpert.site! This guide will walk you through the simple process of installing and activating plugins to enhance the functionality of your dashboard.
Step 1: Log in to the Dashboard
Start by logging in to your dashboard. Visit Dashboard and enter your credentials to access your Proexpert.site account.
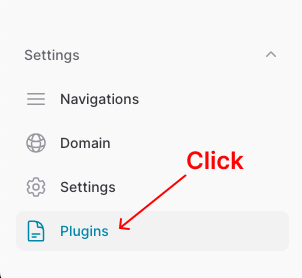
Step 2: Navigate to Plugins
In the dashboard sidebar, locate the "Settings" tab and expand it. Click on the "Plugins" option.
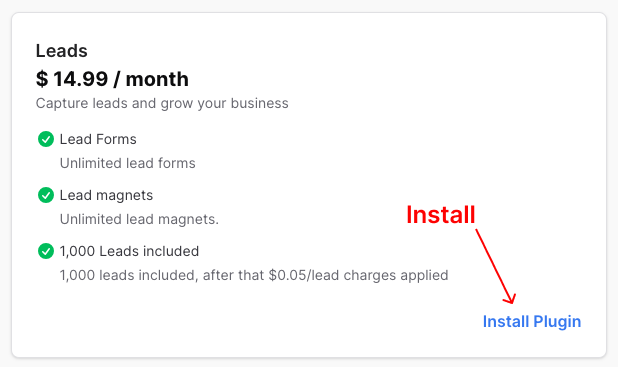
Step 3: Choose a Plugin
You will now see a list of available plugins, both free and premium. Browse through the options and choose the plugin that suits your requirements.
Step 4: Install the Plugin
Click on the desired plugin, and you will find an "Install" button. Click on it to initiate the installation process.
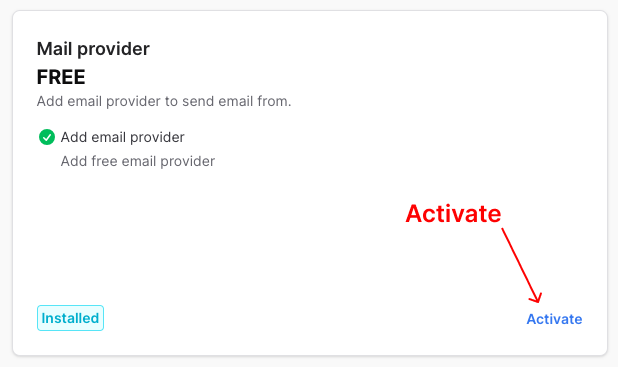
Step 5: Activate the Plugin
Once the installation is complete, you'll see an activation link. Click on it to activate the installed plugin.
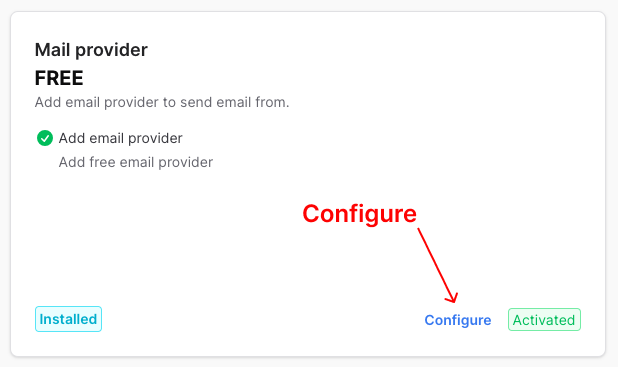
Step 6: Configure if Required
If the plugin requires configuration, you can access its settings through the dashboard. Configure the plugin according to your preferences.
That's it! You have successfully installed, activated, and configured your chosen plugin. Enjoy the enhanced features and functionalities it brings to your Proexpert.site experience.
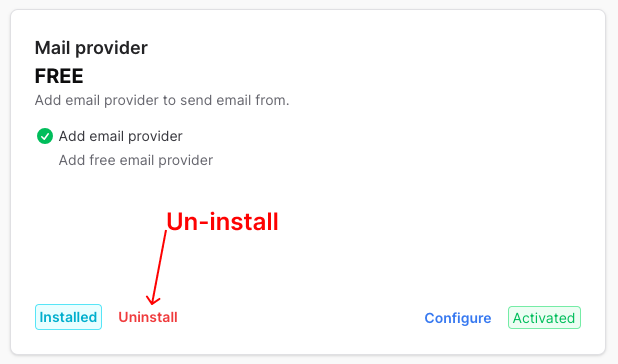
Step 7: Un-install Plugin
To un-install plugin, simple click uninstall plugin button.